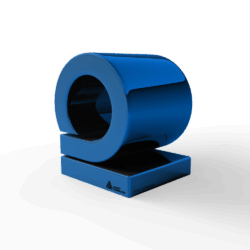
PWF
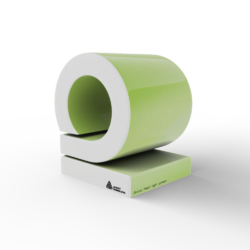
matte Lizard Lime
pwf - matte Lizard Lime

INTERIOR DECOR
EVOLV NF32
interior-decor - EVOLV NF32

TECKWRAP
Bond Gold
teckwrap - Bond Gold

INOZETEK
Super Gloss Chalk Grey
inozetek - Super Gloss Chalk Grey

3M
gloss silver chrome
3m - gloss silver chrome

3M
Satin Flip Psychedelic
3m - Satin Flip Psychedelic

3M
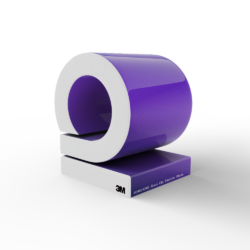
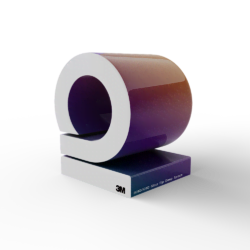
Gloss Flip Psychedelic
3m - Gloss Flip Psychedelic

3M
Satin Flip Ghost Pearl
3m - Satin Flip Ghost Pearl

3M
Gloss Flip Ghost Pearl
3m - Gloss Flip Ghost Pearl

3M
Satin Flip Caribbean Shimmer
3m - Satin Flip Caribbean Shimmer

3M
Satin Flip Glacial Frost
3m - Satin Flip Glacial Frost

3M
Gloss Flip Electric Wave
3m - Gloss Flip Electric Wave

3M
Gloss Flip Deep Space
3m - Gloss Flip Deep Space

3M
Satin Flip Volcanic Flare
3m - Satin Flip Volcanic Flare

3M
Matte Red
3m - Matte Red

3M
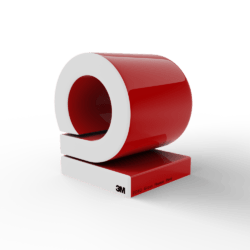
Gloss Hotrod Red
3m - Gloss Hotrod Red

3M
Gloss Flame Red
3m - Gloss Flame Red

3M
Gloss Dark Red
3m - Gloss Dark Red

3M
Satin Smoldering Red
3m - Satin Smoldering Red

3M
Gloss Dragon Fire Red
3m - Gloss Dragon Fire Red

3M
Matte Red Metallic
3m - Matte Red Metallic

3M
Gloss Red Metallic
3m - Gloss Red Metallic

3M
Satin Vampire Red
3m - Satin Vampire Red

3M
Gloss Cinder Spark Red
3m - Gloss Cinder Spark Red

3M
Matte Orange
3m - Matte Orange

3M
Gloss Bright Orange
3m - Gloss Bright Orange

3M
Gloss Deep Orange
3m - Gloss Deep Orange

3M
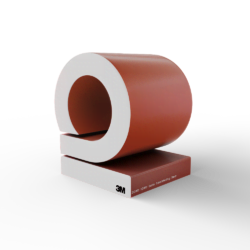
Gloss Burnt Orange
3m - Gloss Burnt Orange

3M
Satin Canyon Copper
3m - Satin Canyon Copper

3M
Gloss Liquid Copper
3m - Gloss Liquid Copper

3M
Gloss Fiery Orange
3m - Gloss Fiery Orange

3M
Gloss Lucid Yellow
3m - Gloss Lucid Yellow

3M
Gloss Bright Yellow
3m - Gloss Bright Yellow

3M
Gloss Sunflower
3m - Gloss Sunflower

3M
Satin Bitter Yellow
3m - Satin Bitter Yellow

3M
Gloss Lemon Sting
3m - Gloss Lemon Sting

3M
Gloss Light Green
3m - Gloss Light Green

3M
Satin Apple Green
3m - Satin Apple Green

3M
Gloss Green Envy
3m - Gloss Green Envy

3M
Gloss Kelly Green
3m - Gloss Kelly Green

3M
Matte Pine Green Metallic
3m - Matte Pine Green Metallic

3M
Matte Military Green
3m - Matte Military Green

3M
Shadow Military green
3m - Shadow Military green

3M
Gloss Atomic Teal
3m - Gloss Atomic Teal

3M
Satin Ocean Shimmer
3m - Satin Ocean Shimmer

3M
Satin Key West
3m - Satin Key West

3M
Gloss Sky Blue
3m - Gloss Sky Blue

3M
Matte Riviera Blue
3m - Matte Riviera Blue

3M
Matte Blue Metallic
3m - Matte Blue Metallic

3M
Gloss Blue Metallic
3m - Gloss Blue Metallic

3M
Satin Perfect Blue
3m - Satin Perfect Blue

3M
Gloss Intense Blue
3m - Gloss Intense Blue

3M
Gloss Blue Fire
3m - Gloss Blue Fire

3M
Gloss Cosmic Blue
3m - Gloss Cosmic Blue

3M
Gloss Blue Raspberry
3m - Gloss Blue Raspberry

3M
Gloss Deep Blue Metallic
3m - Gloss Deep Blue Metallic

3M
Matte Slate Blue Metallic
3m - Matte Slate Blue Metallic

3M
Gloss Ice Blue
3m - Gloss Ice Blue

3M
Gloss Glacier Grey
3m - Gloss Glacier Grey

3M
Gloss Midnight Blue
3m - Gloss Midnight Blue

3M
Gloss Boat Blue
3m - Gloss Boat Blue

3M
Matte Indigo
3m - Matte Indigo

3M
Gloss Plum Explosion
3m - Gloss Plum Explosion

3M
Gloss Wicked
3m - Gloss Wicked

3M
Gloss Hot Pink
3m - Gloss Hot Pink

3M
Gloss Fierce Fuchsia
3m - Gloss Fierce Fuchsia

3M
Matte Black
3m - Matte Black

3M
Dead Matte Black
3m - Dead Matte Black

3M
Matte Deep Black
3m - Matte Deep Black

3M
Matte Black metallic
3m - Matte Black metallic

3M
Matrix Black
3m - Matrix Black

3M
Shadow Black
3m - Shadow Black

3M
Carbon Fiber Black
3m - Carbon Fiber Black

3M
Brushed Black Metallic
3m - Brushed Black Metallic

3M
Satin Black
3m - Satin Black

3M
Gloss Black
3m - Gloss Black

3M
Black gloss metallic
3m - Black gloss metallic

3M
Satin Gold Dust Black
3m - Satin Gold Dust Black

3M
Gloss Black Rose
3m - Gloss Black Rose

3M
Gloss Ember Black
3m - Gloss Ember Black

3M
Gloss Galaxy Black
3m - Gloss Galaxy Black

3M
Satin White Aluminum
3m - Satin White Aluminum

3M
Gloss White Aluminium
3m - Gloss White Aluminium

3M
Brushed Aluminium
3m - Brushed Aluminium

3M
Gloss Storm Grey
3m - Gloss Storm Grey

3M
Satin Battleship Gray
3m - Satin Battleship Gray

3M
Gloss Sterling Silver
3m - Gloss Sterling Silver

3M
Matte Silver
3m - Matte Silver

3M
Carbon Fiber Anthracite
3m - Carbon Fiber Anthracite

3M
Brushed Steel
3m - Brushed Steel

3M
Gloss Anthracite
3m - Gloss Anthracite

3M
Satin Thundercloud
3m - Satin Thundercloud

3M
Matte Grey Aluminium
3m - Matte Grey Aluminium

3M
Brushed Titanium
3m - Brushed Titanium

3M
Matte Charcoal Metallic
3m - Matte Charcoal Metallic

3M
Gloss Charcoal Metallic
3m - Gloss Charcoal Metallic

3M
Matte Dark Grey
3m - Matte Dark Grey

3M
Satin Dark Grey
3m - Satin Dark Grey

3M
Matte White
3m - Matte White

3M
Satin white
3m - Satin white

3M
Gloss White
3m - Gloss White

3M
Carbon Fiber White
3m - Carbon Fiber White

3M
Satin Frozen Vanilla
3m - Satin Frozen Vanilla

3M
Gloss White Gold Sparkle
3m - Gloss White Gold Sparkle

3M
Satin Pearl White
3m - Satin Pearl White

3M
Gloss Light Ivory
3m - Gloss Light Ivory

3M
Satin Caramel Luster
3m - Satin Caramel Luster

3M
Gloss Gold Metallic
3m - Gloss Gold Metallic

3M
Matte Copper Metallic
3m - Matte Copper Metallic

3M
Matte brown Metallic
3m - Matte brown Metallic

3M
Satin Komodo Green
3m - Satin Komodo Green

Avery
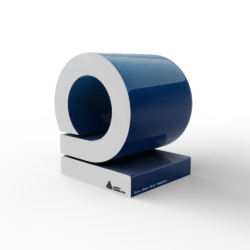
Satin-Hope-green
avery - Satin-Hope-green

Avery
Matte Olive Green
avery - Matte Olive Green

Avery
Satin Dark Basalt
avery - Satin Dark Basalt

Avery
Gloss Rock Grey
avery - Gloss Rock Grey

Avery
Satin Safari gold
avery - Satin Safari gold

Avery
Gloss sand Sparkle
avery - Gloss sand Sparkle

Avery
Gloss Metallic Spark
avery - Gloss Metallic Spark

Avery
Gloss Metallic Magnetic Burst
avery - Gloss Metallic Magnetic Burst

Avery
Gloss Metallic Radioactive
avery - Gloss Metallic Radioactive

Avery
Gloss Eclipse Metallic
avery - Gloss Eclipse Metallic

Avery
Glossy Cloudy Blue
avery - Glossy Cloudy Blue

Avery
Glossy Light Pistachio
avery - Glossy Light Pistachio

Avery
Glossy Sea-Breeze Blue
avery - Glossy Sea-Breeze Blue

Avery
Glossy Smoky Blue
avery - Glossy Smoky Blue

Avery
Satin Lightning Ridge
avery - Satin Lightning Ridge

Avery
Glossy Lightning Ridge
avery - Glossy Lightning Ridge

Avery
Satin Fresh Spring gold silver
avery - Satin Fresh Spring gold silver

Avery
Glossy Fresh Spring gold:silver
avery - Glossy Fresh Spring gold:silver

Avery
Satin Urban Jungle silver green
avery - Satin Urban Jungle silver green

Avery
Glossy Urban Jungle silver:green
avery - Glossy Urban Jungle silver:green

Avery
Satin Roaring Thunder blue red
avery - Satin Roaring Thunder blue red

Avery
Glossy Roaring Thunder blue red
avery - Glossy Roaring Thunder blue red

Avery
Satin Rushing Riptide cyaan purple
avery - Satin Rushing Riptide cyaan purple

Avery
Glossy Rushing Riptide cyaan purple
avery - Glossy Rushing Riptide cyaan purple

Avery
Satin Rising Sun red gold
avery - Satin Rising Sun red gold

Avery
Glossy Rising Sun red gold
avery - Glossy Rising Sun red gold

Avery
Glossy Ambulance Yellow
avery - Glossy Ambulance Yellow

Avery
Glossy Yellow
avery - Glossy Yellow

Avery
Satin yellow
avery - Satin yellow

Avery
Glossy Dark Yellow
avery - Glossy Dark Yellow

Avery
Glossy pearl Gold Orange
avery - Glossy pearl Gold Orange

Avery
Matte Metallic Blaze Orange
avery - Matte Metallic Blaze Orange

Avery
Glossy Orange
avery - Glossy Orange

Avery
Satin Orange
avery - Satin Orange

Avery
Matte Orange
avery - Matte Orange

Avery
Gloss Cardinal Red
avery - Gloss Cardinal Red

Avery
Satin Cardinal Red
avery - Satin Cardinal Red

Avery
Gloss Carmine Red
avery - Gloss Carmine Red

Avery
Satin Carmine Red
avery - Satin Carmine Red

Avery
Gloss Red
avery - Gloss Red

Avery
Gloss Soft Red
avery - Gloss Soft Red

Avery
Red diamond
avery - Red diamond

Avery
Gloss pearl red
avery - Gloss pearl red

Avery
Matte Metallic Cherry
avery - Matte Metallic Cherry

Avery
Matte Metallic Garnet Red
avery - Matte Metallic Garnet Red

Avery
Gloss Burgundy
avery - Gloss Burgundy

Avery
Satin Bubblegum pink
avery - Satin Bubblegum pink

Avery
Matte Metallic Pink
avery - Matte Metallic Pink

Avery
satin metallic purple
avery - satin metallic purple

Avery
Matte Metallic Purple
avery - Matte Metallic Purple

Avery
Purple diamond
avery - Purple diamond

Avery
Matte Metallic Powder Blue
avery - Matte Metallic Powder Blue

Avery
Matte Metallic Frosty Blue
avery - Matte Metallic Frosty Blue

Avery
Gloss Light Blue
avery - Gloss Light Blue

Avery
satin light blue
avery - satin light blue

Avery
Bright Blue Gloss Metallic
avery - Bright Blue Gloss Metallic

Avery
Blue diamond
avery - Blue diamond

Avery
Gloss Intense Blue
avery - Gloss Intense Blue

Avery
Gloss Blue
avery - Gloss Blue

Avery
Gloss Dark Blue
avery - Gloss Dark Blue

Avery
satin dark blue
avery - satin dark blue

Avery
Matte Metallic Brilliant Blue
avery - Matte Metallic Brilliant Blue

Avery
Matte Metallic Blue
avery - Matte Metallic Blue

Avery
Matte Metallic Night Blue
avery - Matte Metallic Night Blue

Avery
Gloss Indigo Blue
avery - Gloss Indigo Blue

Avery
Gloss Dark Blue Metallic
avery - Gloss Dark Blue Metallic

Avery
Glossy Pearl light green
avery - Glossy Pearl light green

Avery
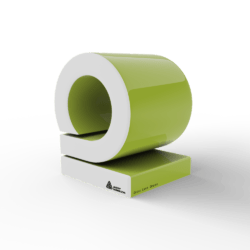
Gloss Lime Green
avery - Gloss Lime Green

Avery
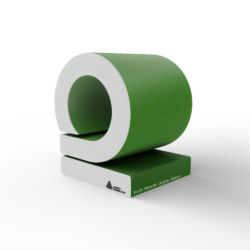
Gloss Grass Green
avery - Gloss Grass Green

Avery
satin grass green
avery - satin grass green

Avery
Matte Metallic Apple Green
avery - Matte Metallic Apple Green

Avery
Gloss pearl Dark Green
avery - Gloss pearl Dark Green

Avery
Gloss Dark Green
avery - Gloss Dark Green

Avery
Satin Khaki Green
avery - Satin Khaki Green

Avery
Matte Khaki Green
avery - Matte Khaki Green

Avery
Carbon Fiber White
avery - Carbon Fiber White

Avery
Gloss White
avery - Gloss White

Avery
Satin White
avery - Satin White

Avery
Matte White
avery - Matte White

Avery
Gloss pearl white
avery - Gloss pearl white

Avery
Satin pearl white
avery - Satin pearl white

Avery
White diamond
avery - White diamond

Avery
Silver Gloss metallic
avery - Silver Gloss metallic

Avery
Gloss Metallic Quick Silver
avery - Gloss Metallic Quick Silver

Avery
Satin Silver Metallic
avery - Satin Silver Metallic

Avery
Matte Metallic Silver
avery - Matte Metallic Silver

Avery
Silver diamond
avery - Silver diamond

Avery
Brushed Aluminium
avery - Brushed Aluminium

Avery
Gloss Grey
avery - Gloss Grey

Avery
Satin grey
avery - Satin grey

Avery
Brushed Titanium
avery - Brushed Titanium

Avery
Matte Metallic Anthracite
avery - Matte Metallic Anthracite

Avery
Gloss Dark Grey
avery - Gloss Dark Grey

Avery
Matte Dark Grey
avery - Matte Dark Grey

Avery
Matte Metallic Gunmetal
avery - Matte Metallic Gunmetal

Avery
Matte Metallic Charchoal
avery - Matte Metallic Charchoal

Avery
Brushed Steel
avery - Brushed Steel

Avery
Gloss metallic Grey
avery - Gloss metallic Grey

Avery
Carbon Fiber Black
avery - Carbon Fiber Black

Avery
Gloss Black
avery - Gloss Black

Avery
Satin Black
avery - Satin Black

Avery
Matte Black
avery - Matte Black

Avery
Gloss Metallic Black
avery - Gloss Metallic Black

Avery
Brushed Black
avery - Brushed Black

Avery
Gloss Gold metallic
avery - Gloss Gold metallic

Avery
Diamond Amber
avery - Diamond Amber

Avery
Brushed Bronze
avery - Brushed Bronze

Avery
Matte metallic Brown
avery - Matte metallic Brown

Avery
Gloss Metallic Brown
avery - Gloss Metallic Brown

Avery
Satin Rock Grey Metallic
avery - Satin Rock Grey Metallic

Avery
Rose Gold Chrome
avery - Rose Gold Chrome

Avery
Violet Chrome
avery - Violet Chrome

Avery
Matt silver Chrome
avery - Matt silver Chrome

Avery
silver Chrome
avery - silver Chrome

Avery
Gold Chrome
avery - Gold Chrome

Avery
Red Chrome
avery - Red Chrome

Avery
Blue Chrome
avery - Blue Chrome

Avery
Black Chrome
avery - Black Chrome

KPMF
Satin Stealth Tundra
kpmf - Satin Stealth Tundra

KPMF
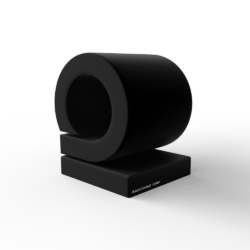
Matte Black
kpmf - Matte Black

KPMF
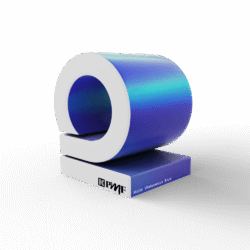
Metro Matte Violaceous Blue
kpmf - Metro Matte Violaceous Blue

Custom Colors
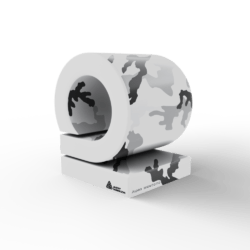
Aspen snowcamo
customcolors - Aspen snowcamo

Custom Colors
custom printed
customcolors - custom printed

Custom Colors
discontinued color
customcolors - discontinued color

Custom Colors
muttha purple
customcolors - muttha purple

Custom Colors
Carbon PP2 Glossy
customcolors - Carbon PP2 Glossy

Custom Colors
Carbon PP2 Matte
customcolors - Carbon PP2 Matte

Oracal
Aquamarine
oracal - Aquamarine

Oracal
Papyrus
oracal - Papyrus

Oracal
Charcoal Metallic
oracal - Charcoal Metallic

Oracal
Champagne Metallic
oracal - Champagne Metallic

Paint Protection Film
Premiumshield Glossy
paint-protection-film - Premiumshield Glossy

Paint Protection Film
Premiumshield Matt
paint-protection-film - Premiumshield Matt

APA / EVOLV
Gloss Supercandy Burgundy
apa - Gloss Supercandy Burgundy

APA / EVOLV
Black Velvet
apa - Black Velvet

APA / EVOLV
Black Olive
apa - Black Olive
oops! No Colors found. Try another filter or Reset filter
 Referal Letter Aquila Yacht
 carwrap simulator
 3D CARWRAP CONFIGURATOR
